

How to Set Up ADB (Android Debug Bridge) with Android SDK on Windows 7 & 8: Android SDK brings with itself the two most important tools needed for tweaking your Android phone, ADB (Android Debug Bridge) and Fastboot.
Why do we need them? ADB and Fastboot helps us install a custom recovery, which allows us to root Android devices, install custom ROMs and perform many other system tweaks which are not otherwise possible.
We always recommend you that the Android USB Drivers properly installed and Android phone should be working perfectly fine with ADB and Fastboot.
Recommend: Download Android USB Drivers for Windows And Mac OS X
Let’s get start the set up of ADB for your Android phone so that you never have to go through USB drivers issues again when trying out a custom firmware.
How to Set Up ADB with Android SDK
Follow this step-by-step instructions to set up ADB on your computer. Follow the steps carefully and make sure you read the tutorial once before actually performing it.
Pre-requisits:
- An Android phone.
- A microUSB DATA cable
- A computer (PC or Laptop)
- Android USB Driver for Computer (Follow above link For Drivers for your smartphone)
- Android SDK Manager **
** Important! If you do not have downloaded and install Android SDK Manager, you can Follow this post Download And Install Android SDK with USB Driver.
We have all the Android files, Drivers and Tools needed. Noe proceed on setting up ADB. How to use the downloaded USB drivers to set up ADB.
NOTE: USB drivers may be different for other Android phones.
Step 1 – Make sure USB debugging Mode is enabled on your phone. How? See here: How To Enable Android USB Debugging Mode.
Step 2 – Connect your Android phone to the computer and wait till your PC installs all the drivers it could. Most of the drivers would fail to install.
Step 3 – Go to Start -> Control Panel -> System -> Device Manager. In the list, you will see your phone.
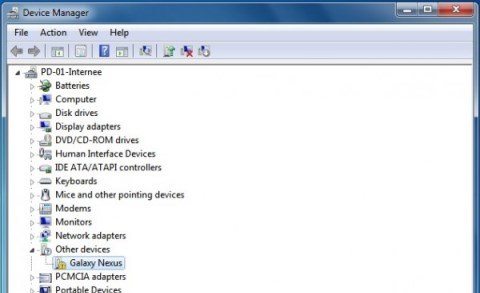 Step 4 – Right-click on it, and select Update Driver Software. Select the Browse my computer for driver software.
Step 5 – Select the Let me pick from the list.
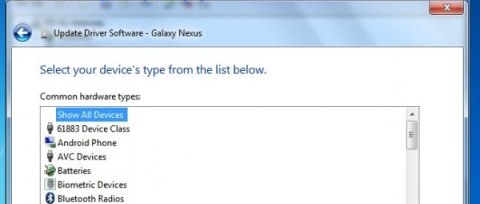
Step 6 – Select Show All Devices at the Top and click Next.
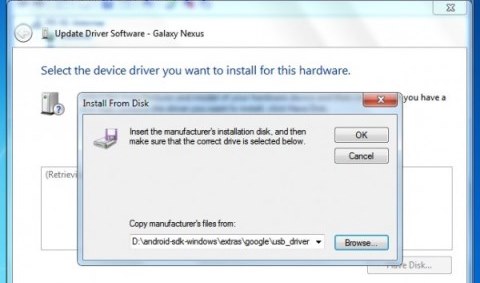
 Step 7 – Click the “Have Disk”. Now browse to your Android SDK Folder where you extracted> Go to Extra>Google>Usb_Drivers directory and select android_winusb.inf File. Click Open and then click on OK.
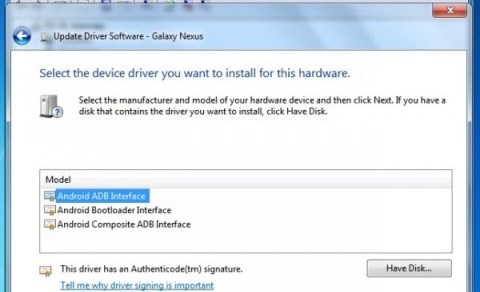
 Step 8 – You will be show a list of Android drivers. Select Android ADB Interface and click Next.
 Step 9 – Click Yes to the warning message. Now wait till driver installation gets over. Click the ‘Install’ button if you see the following warning message.
Step 10 – Congratulations! ADB drivers are now successfully installed on your computer!
Step 11 – Now to verify ADB is working fine, go to the Android SDK >platform-tools directory.
Step 12 – Open Command Prompt. Hold Shift key + right-click anywhere in the folder and select Open command prompt here.
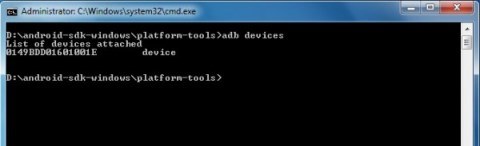 Step 13 – Type “adb devices” (without quotes) in the Command Prompt window and press Enter. If you see the screen as in the screenshot above, you have successfully set up ADB on your computer for your Android phone.
