How to Download And Install Android SDK with USB Driver: We need to get Java Platform installed and then download the Android USB drivers (and some other tools) using Android SDK Manager. This is very simple and how it is to be done:
 Step 1 – Download and Install Java Platform (JDK) from Java SE Software Development Kit (SDK) downloads. Once installed, proceed to the next step.
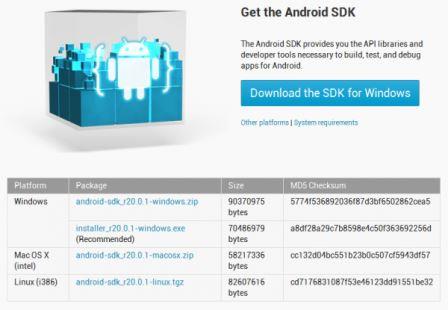
Step 2 – Download Android SDK from the Android Developers website. Download the ZIP package file for Windows | Mac | Linux (32&64 Bit).
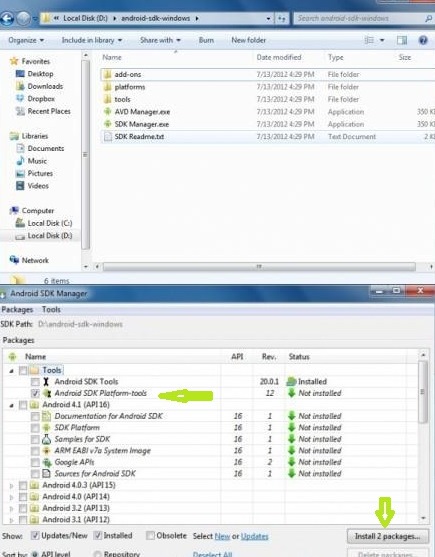
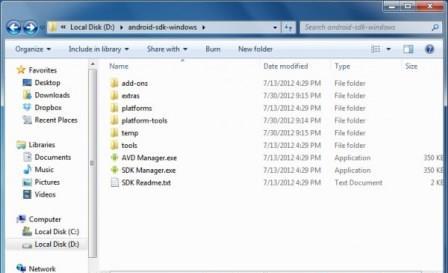
Step 3 – Extract the zip file anywhere in your computer. For instant; we extracted in D: drive. D:android-sdk-windows.
Step 4 – Open SDK Manager.exe and wait till it loads (fetches) all the packages.
Step 5 – Only select two pakcages. Check Android SDK Platform-tools and Google USB Driver options. Uncheck everything else as shown below. Then click on the “Install 2 packages button”
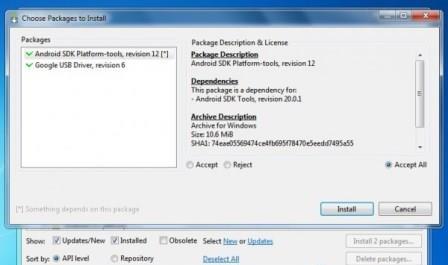
 Step 6 – Confirm the packages that you selected. Check The Accept Option and click the “Install” button.
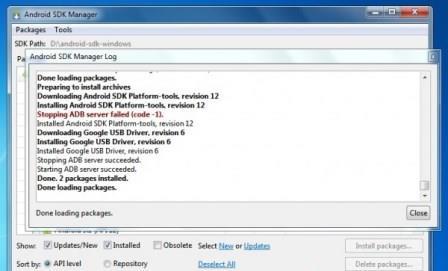
 Step 7 – Wait till the downloading finishes.
Step 8 – Once you get the following screen, this means all the packages have been successfully installed.
 Step 9 – Some thing is changed If you see again into the Android SDK folder (D:android-sdk-windows), the following directories now added. extras and platform-tools which are the most important ones that we need. Thats it…
 Hope it will help you and if you not get it please reply in comments….


